

1
Open the Deploy App page
In the bunny.net dashboard, go to Magic Containers and click + Add App.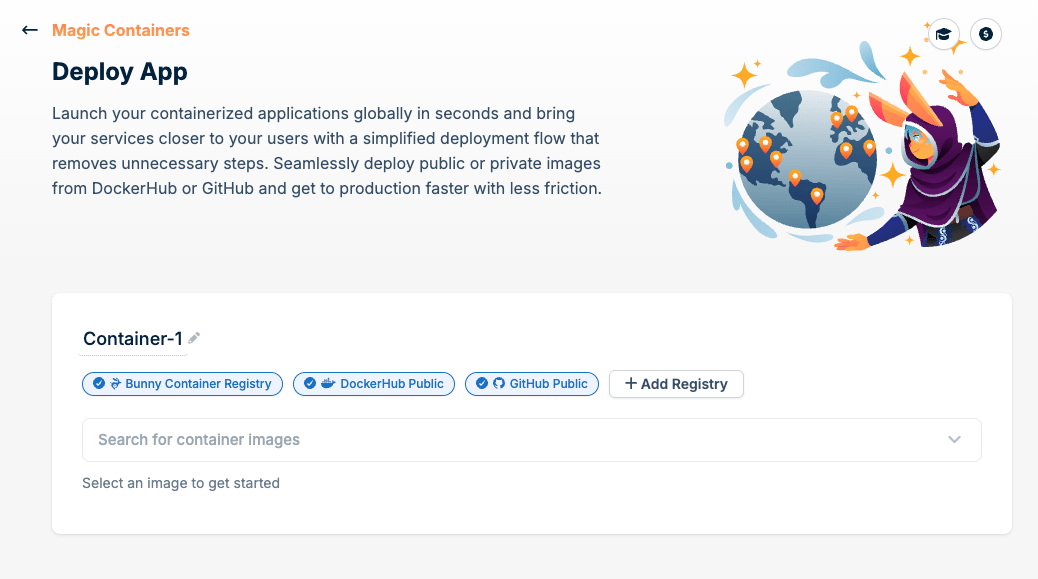
Container-1. When you select an image, the container is renamed after the image automatically. Click the pencil icon to give it a different name.2
Select a container image
Use the search field to find a container image. The search covers every registry connected to your account: the public Docker Hub and GitHub registries, plus any private Docker Hub or GitHub registries you’ve added. The registry chips above the search field show which registries are included. Click + Add Registry to connect a private registry without leaving the page.Once you select an image, its available tags are displayed. If a 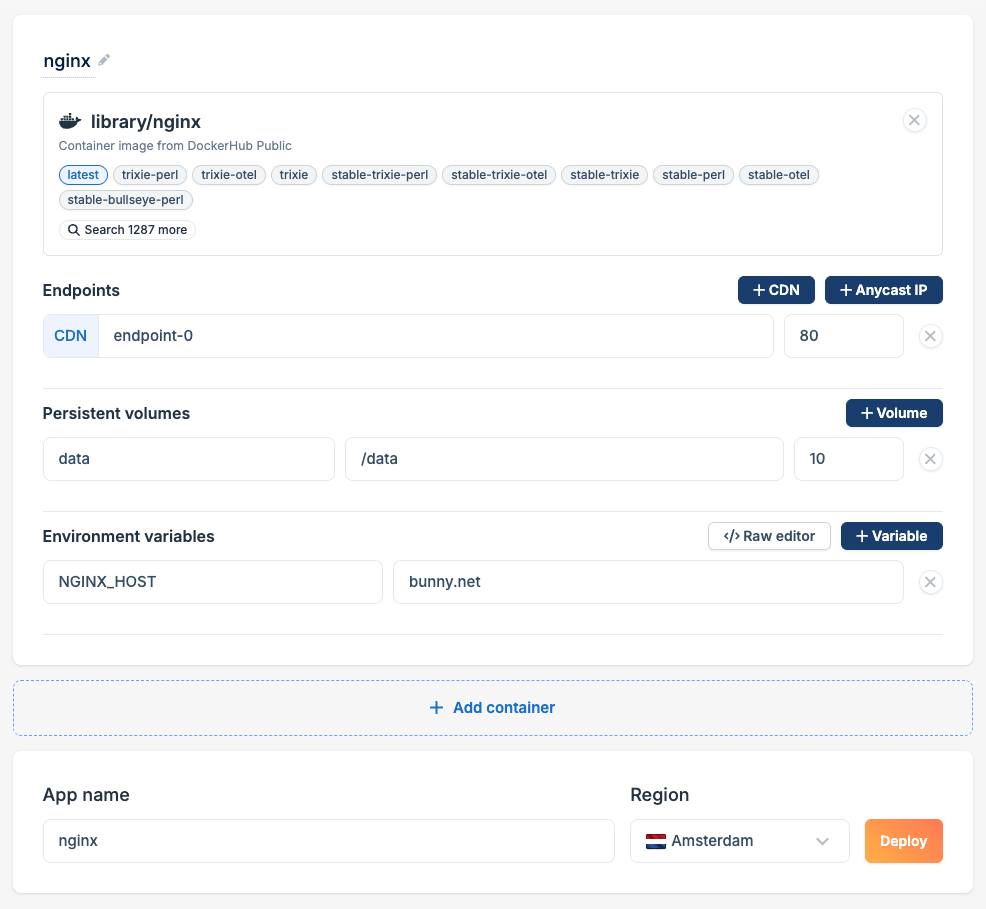
latest tag exists, it is selected automatically. Click any other tag to switch, or use the search button to find a tag that isn’t listed.Magic Containers only supports images built for the linux/amd64 architecture.
3
Configure endpoints
Endpoints define how your container is reachable from the internet. Two endpoint types are available:
- CDN: routes traffic through bunny.net’s CDN edge network. Best for HTTP(S) services that benefit from caching and global distribution.
- Anycast IP: exposes your container directly on a globally anycast IP. Better suited for non-HTTP protocols or latency-sensitive TCP and UDP services.
4
Add persistent volumes (optional)
If your container needs to write data that should survive restarts and redeployments, click + Volume under Persistent volumes. Give the volume a name, set the mount path inside the container, and set its size in GB.Leave this section empty if your container is stateless. See Persistent Volumes for how volumes behave across regions and instances.
5
Set environment variables
Under Environment variables, configure any runtime settings your container needs. Click + Variable to add a key and value one at a time, or click Raw editor to paste multiple variables in
KEY=value form.For public Docker Hub images, Magic Containers inspects the image metadata and pre-fills known environment variables with their default values. Review each one before deploying. Pay special attention to:- Passwords and secrets: replace any placeholder values with strong, unique secrets. Never leave default or example passwords in production.
- Paths and ports: confirm that pre-filled values match your actual container configuration.
6
Add more containers (optional)
Click + Add container to add another container to the same app. Each container gets its own image, endpoints, volumes, and environment variables.All containers in an app run in the same pod and share a network namespace, so they can reach each other on
localhost. They must listen on different ports. See Multi-Container Apps.7
Name your app and pick a region
Under App name, enter a name for the app. The name of the first image is pre-filled as a default.Under Region, the region geographically closest to you is selected automatically. Change it if you need to deploy closer to your users or a specific data source. See Regions for the full list.After deploying, you can add regions and configure scaling from the app’s Regions and Scaling settings. See Autoscaling.
8
Deploy
Once everything looks good, click Deploy. Your app is created, the containers are scheduled, and the endpoints are activated.You’ll be taken to the app overview where you can monitor the deployment status.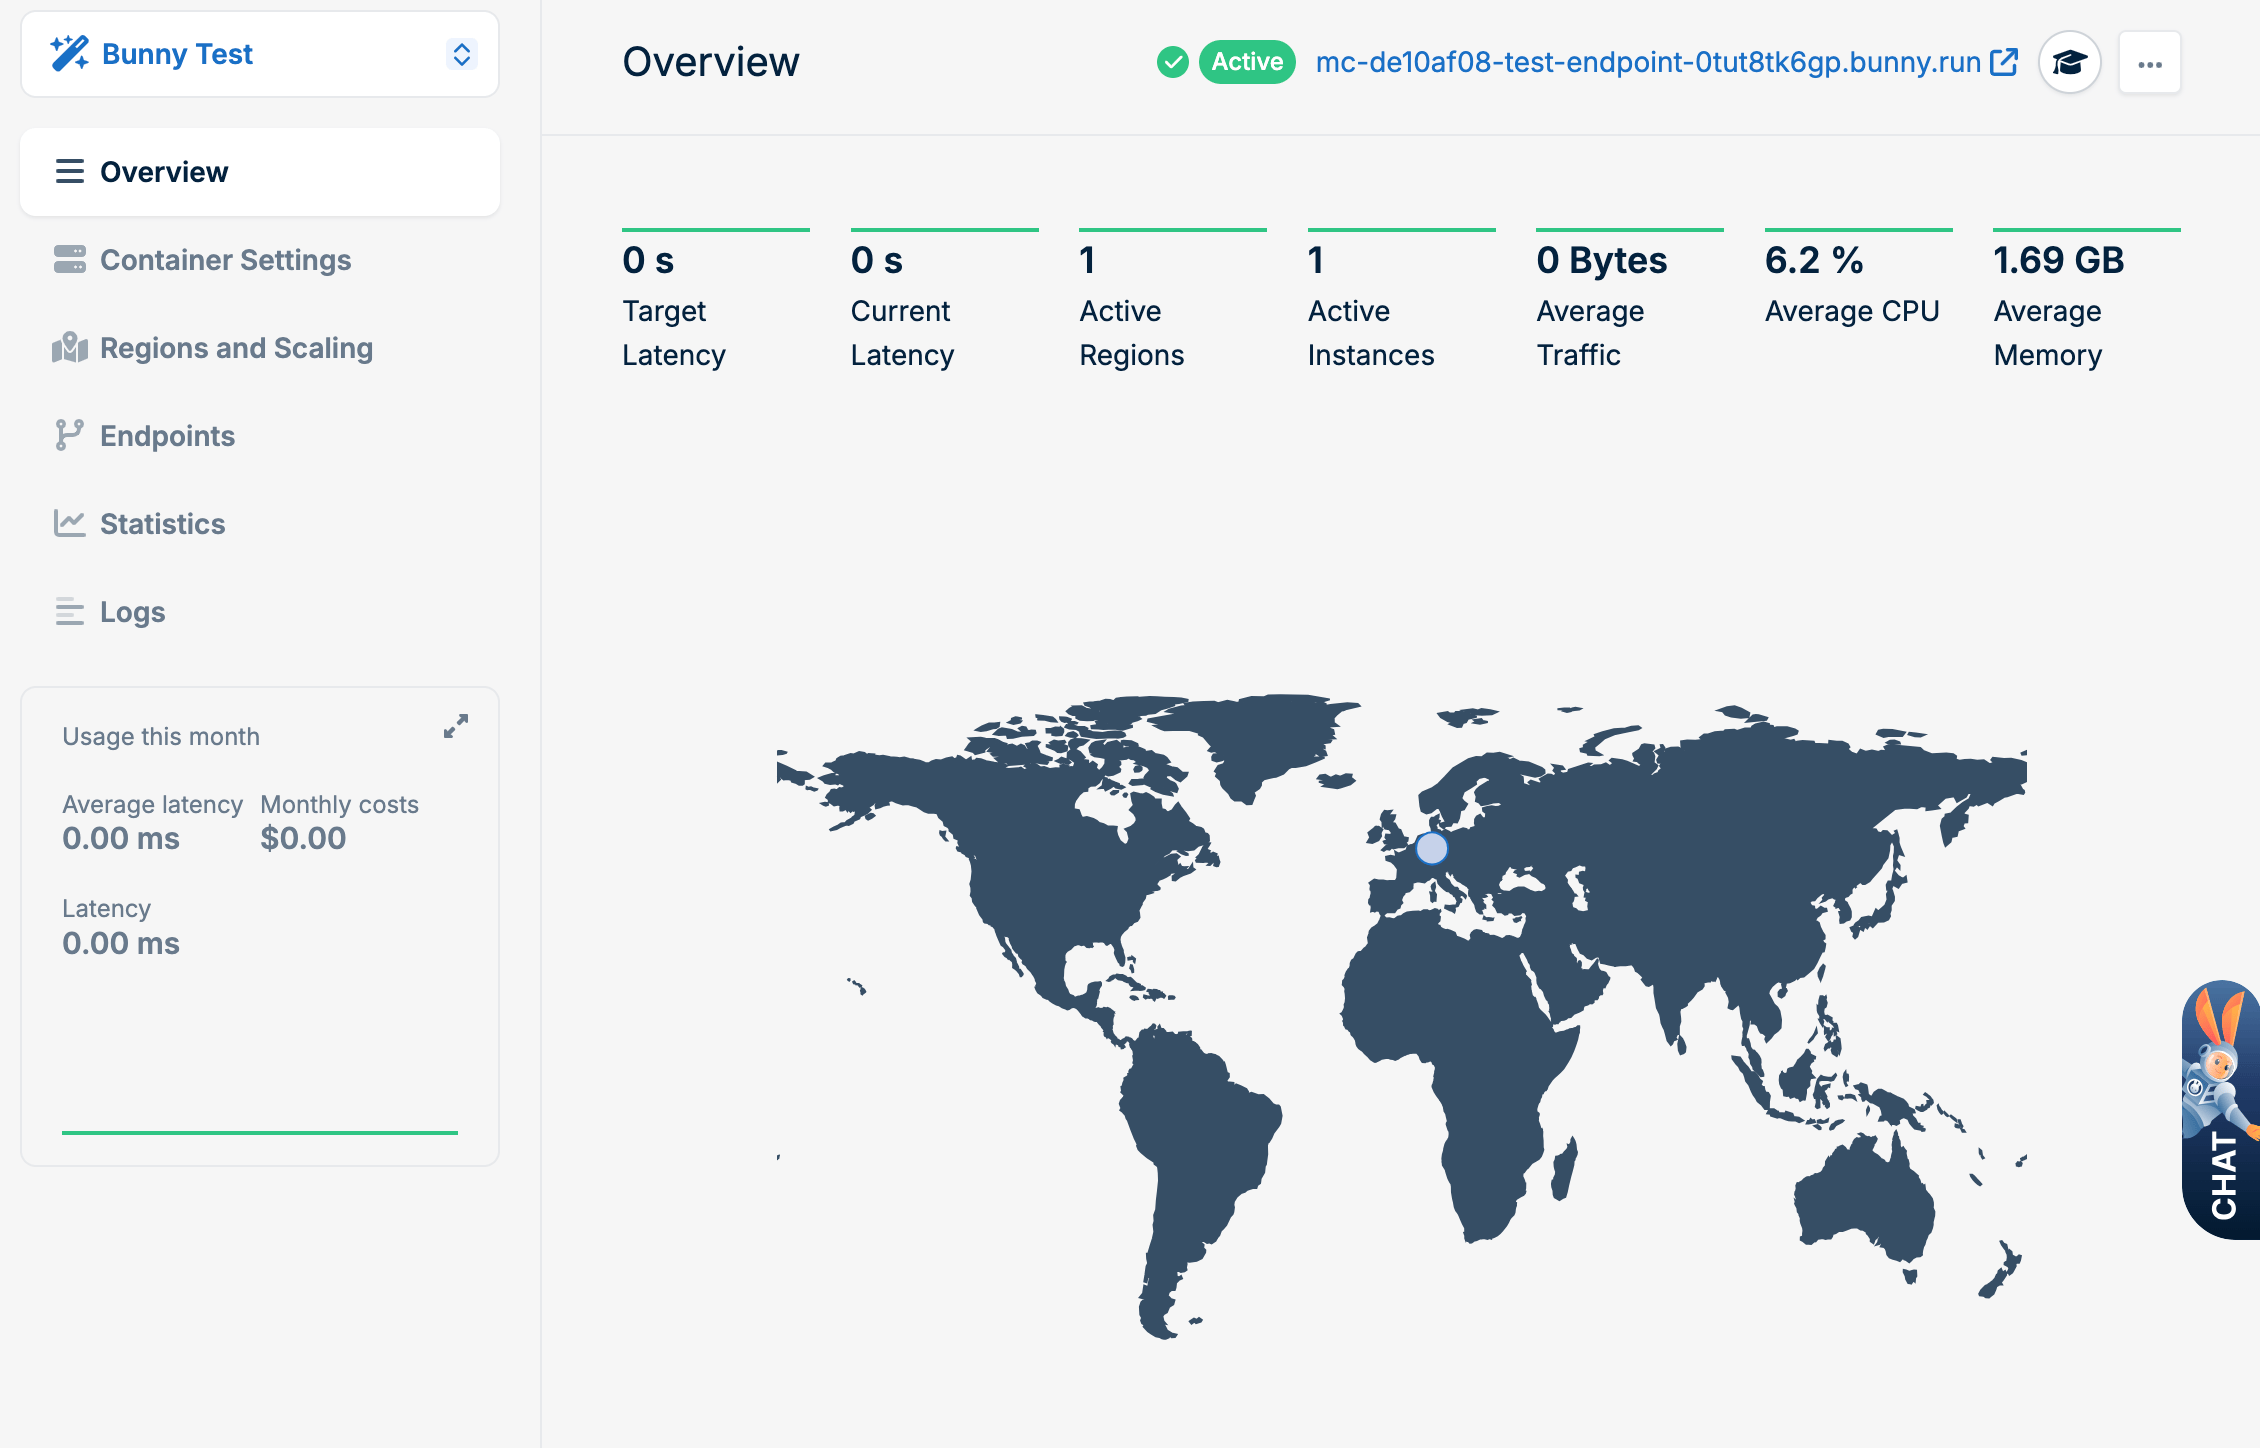
Trial accounts must add valid payment card details before deploying, and are limited to one application, three regions, and three instances per region. See Limits.