

1
Create a Pull Zone
In the bunny.net dashboard, select Add Pull Zone and configure your origin.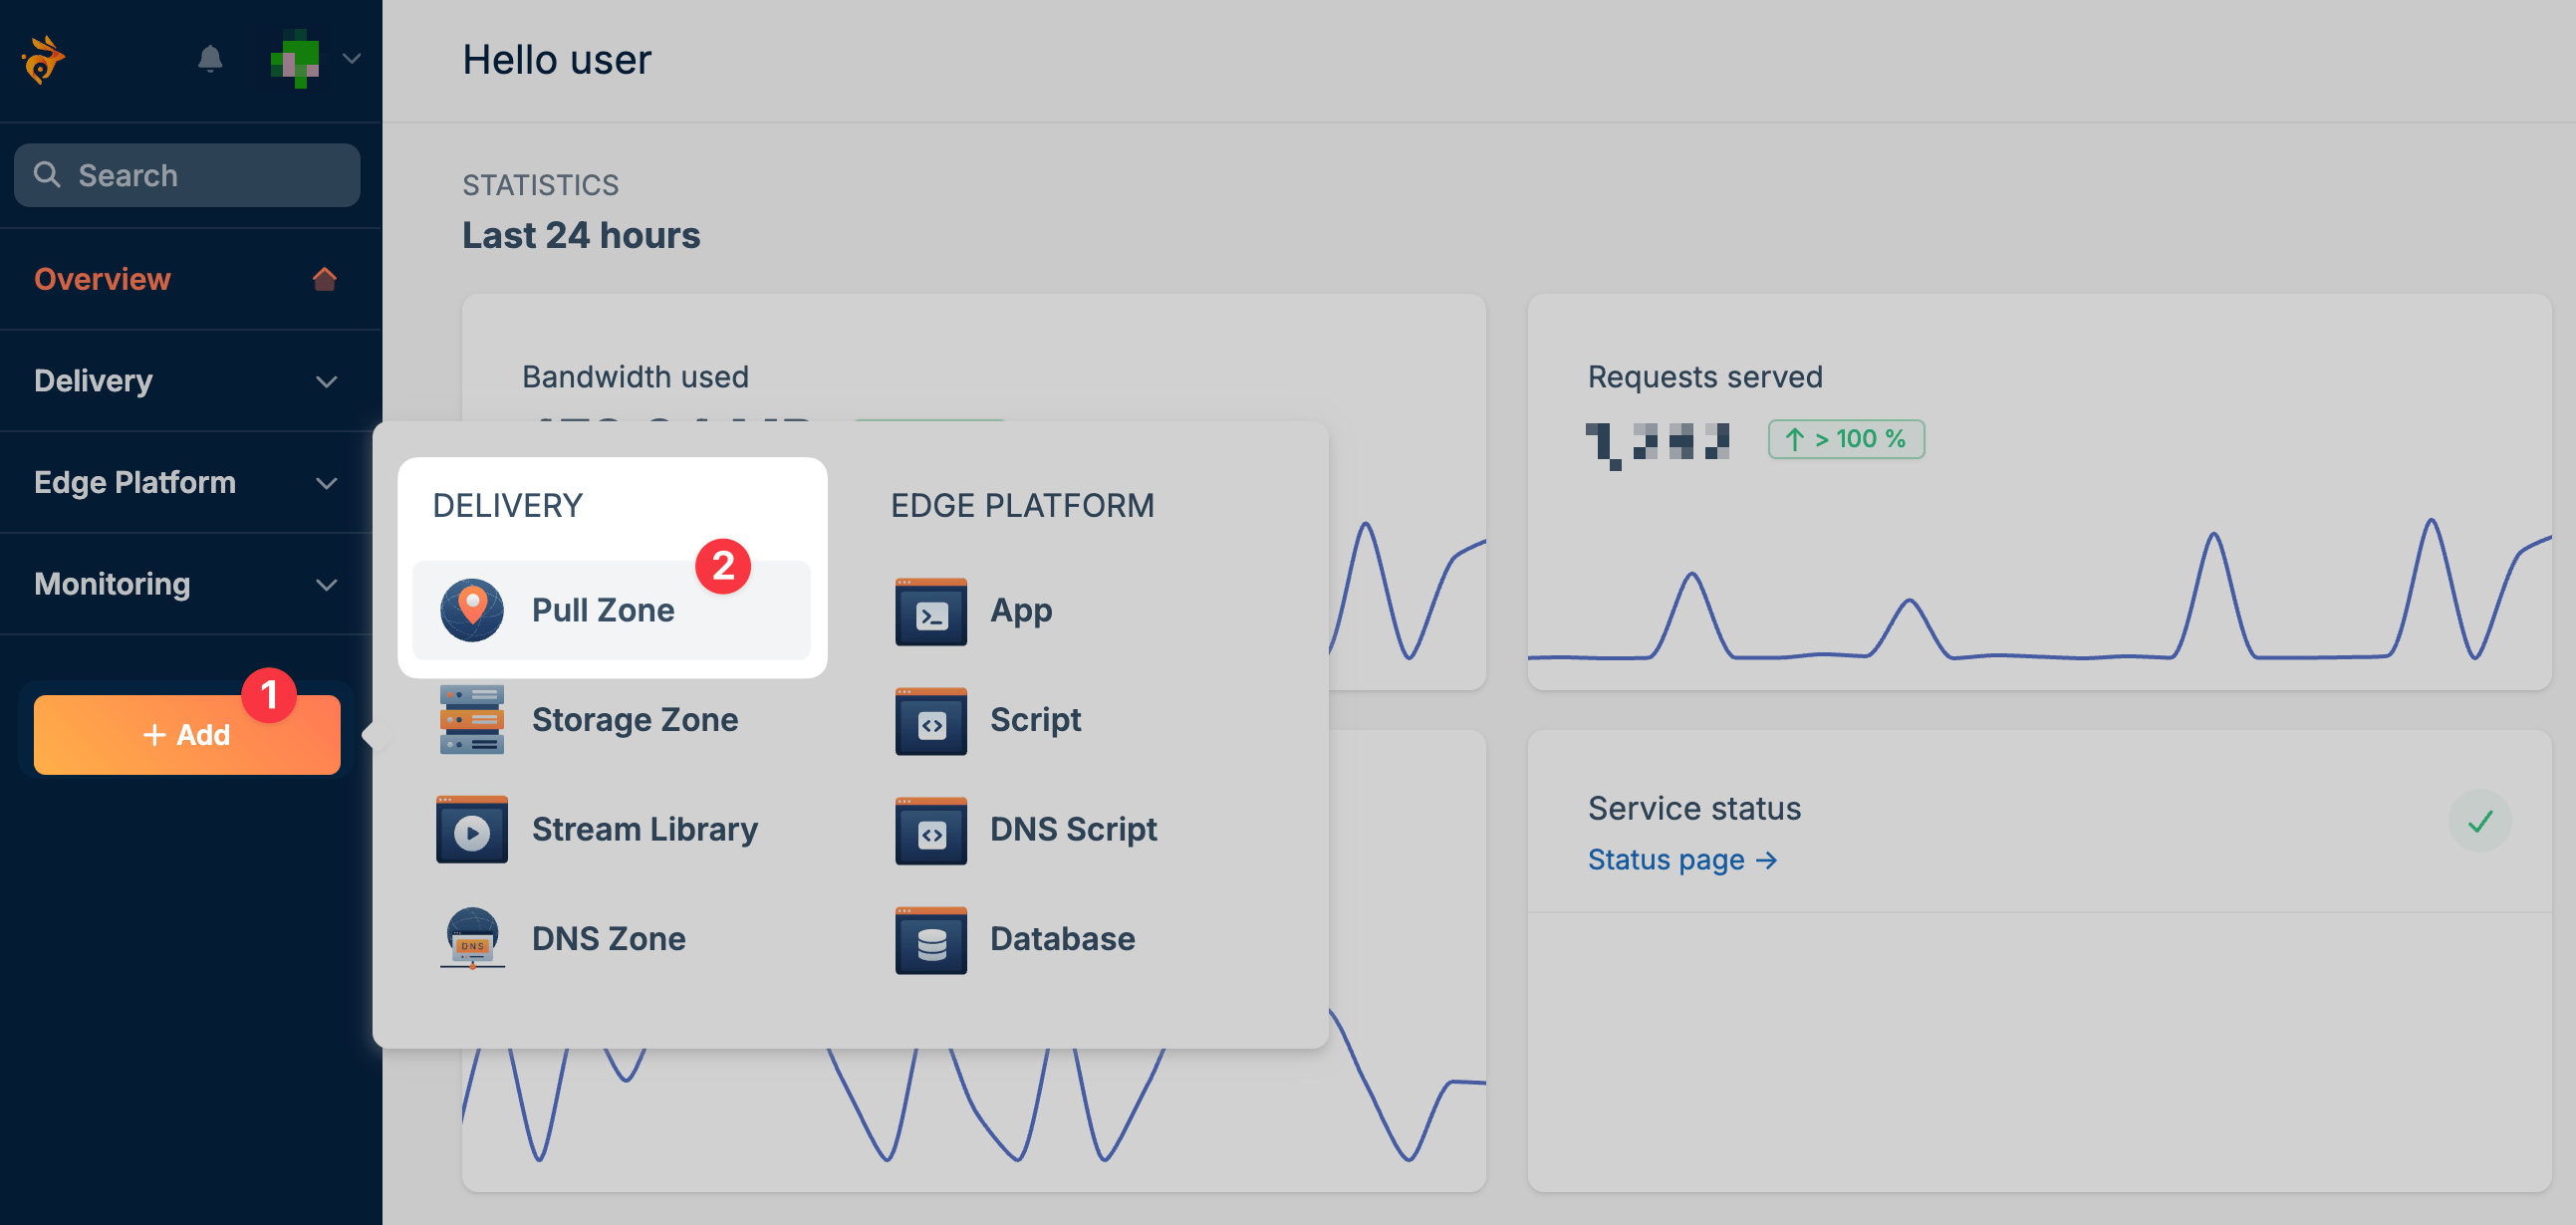
2
Add your hostname
Open your Pull Zone and add your custom hostname (e.g., 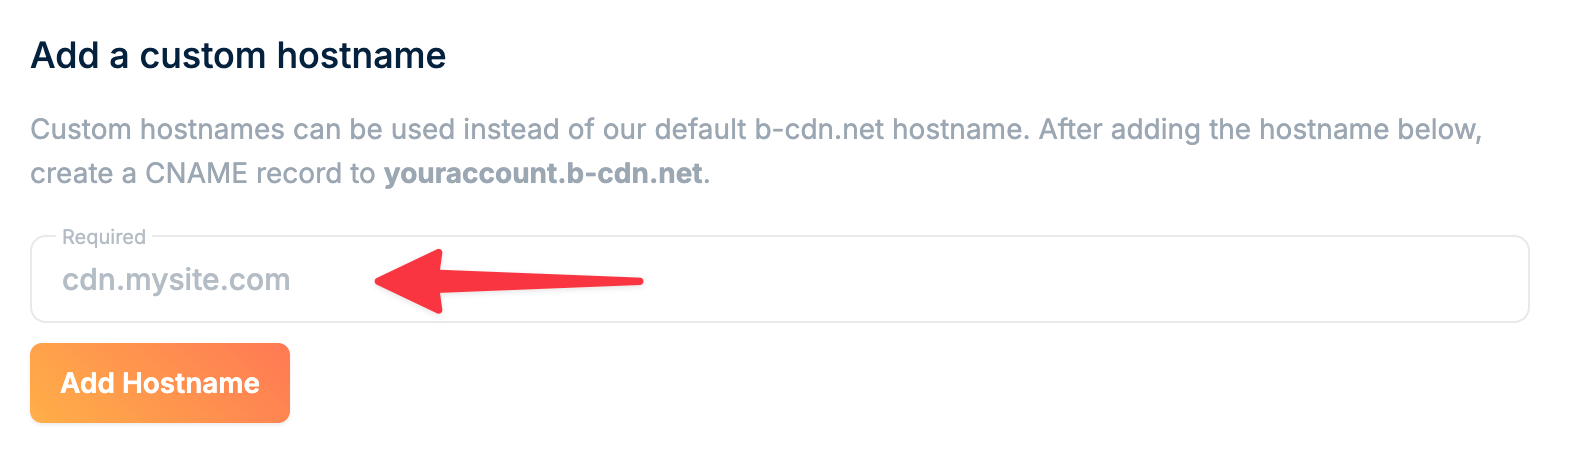
cdn.example.com).The hostname must be fully configured on the Pull Zone before requesting a certificate.
3
Request external DNS certificate
Initiate certificate issuance using DNS validation:This request returns the DNS TXT record required for domain verification.
API Reference
View full endpoint documentation
4
Create DNS TXT record
Add the returned TXT record to your domain’s DNS zone.Example:Wait until the record is publicly resolvable before continuing.
5
Complete certificate issuance
Finalize the process once the TXT record is live:This validates the DNS record and issues the certificate via Let’s Encrypt.
API Reference
View full endpoint documentation
6
Update DNS to use your Pull Zone hostname
After the certificate is issued, update your domain’s DNS records to point to your Pull Zone hostname (e.g.,
yourzone.b-cdn.net).- Use a CNAME record for subdomains (e.g.,
cdn.example.com) - Use an ALIAS/ANAME record if configuring an apex/root domain
7
Automatic renewal
After the initial issuance:
- Certificates automatically switch to HTTP-01 validation
- Renewals happen automatically
- No further DNS changes are required
- DNS TXT records must be publicly accessible before completing the request
- DNS propagation time depends on your DNS provider
- Certificate issuance depends on successful validation by Let’s Encrypt