

Prerequisites
- cPanel/WHM server with root access
- A bunny.net account with an API key
- Access to the plugin repository (requires approval)
The plugin repository is protected. To get access, contact our sales team.
Install the plugin
Install the plugin using either APT or RPM depending on your server’s package manager.- APT (Debian/Ubuntu)
- RPM (AlmaLinux/Rocky)
Configure the APT repository:Install the packages:
Set up the plugin
After installation, open WHM and navigate to the bunny.net cPanel plugin page.1
Set up the DNS cluster
The plugin requires a DNS cluster to be configured. Click Setup DNS cluster to open the DNS Cluster configuration page.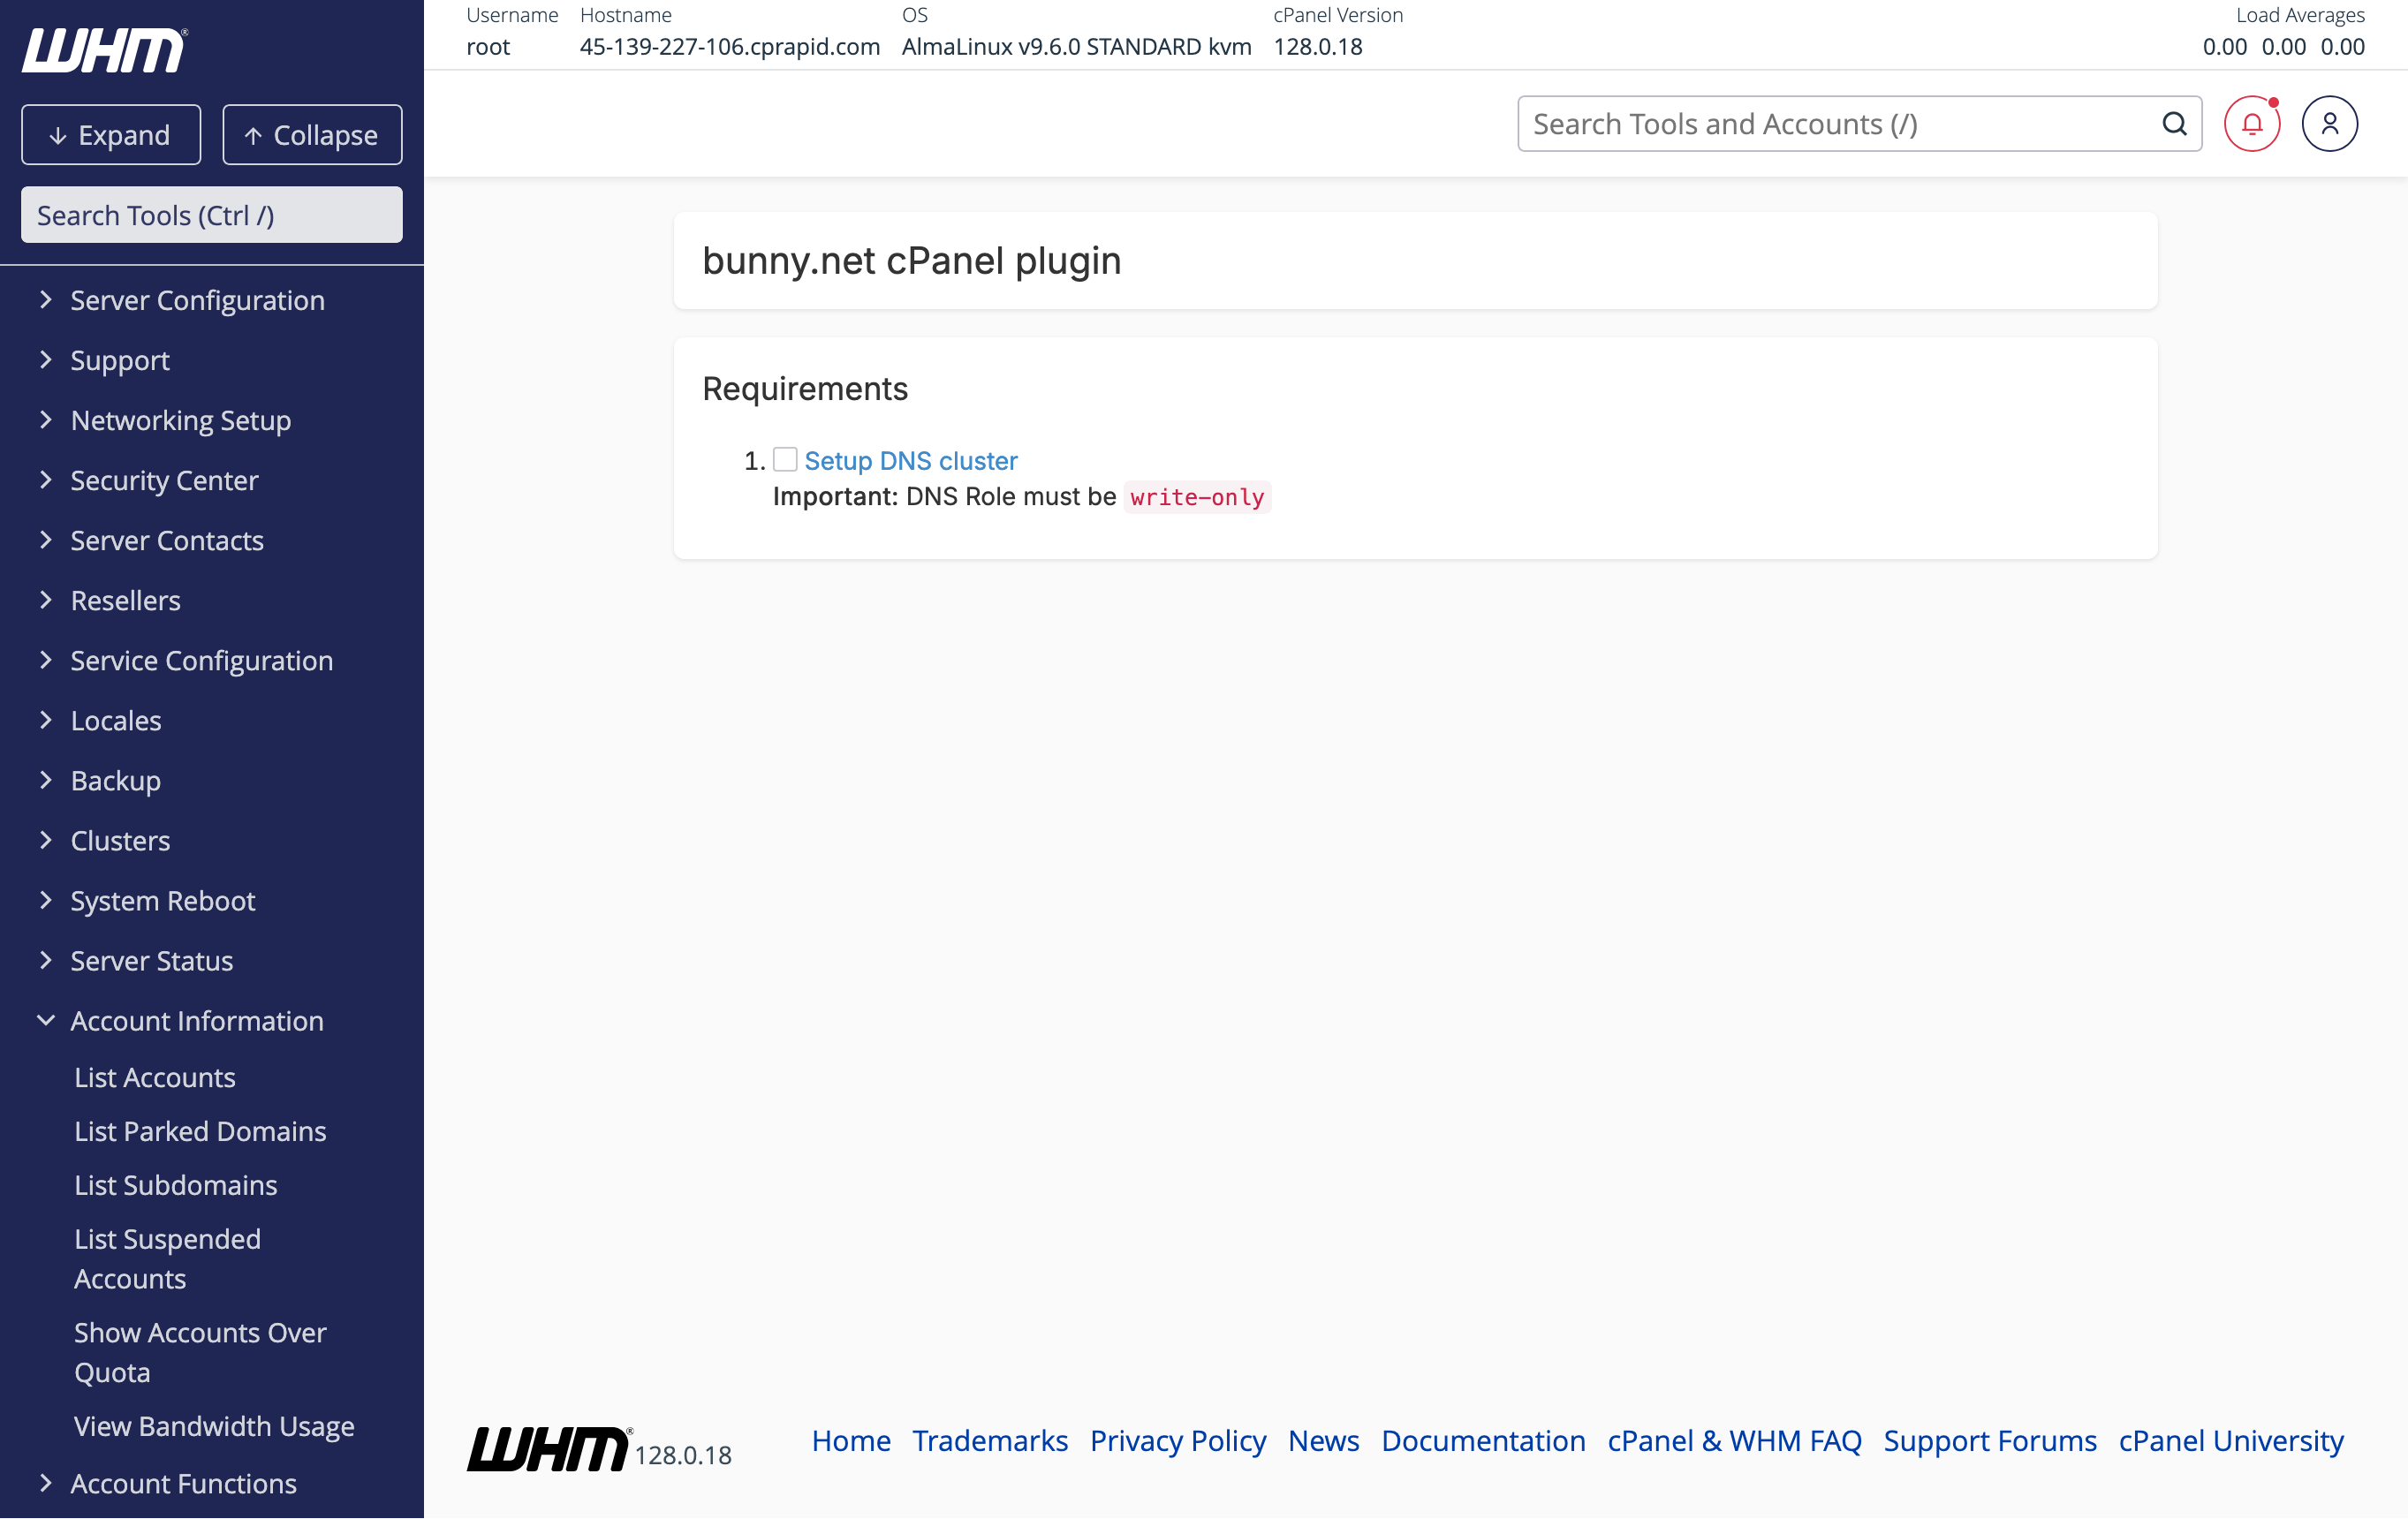
2
Add a server to the DNS cluster
On the DNS Cluster page, select cPanel as the Backend Type and click Configure.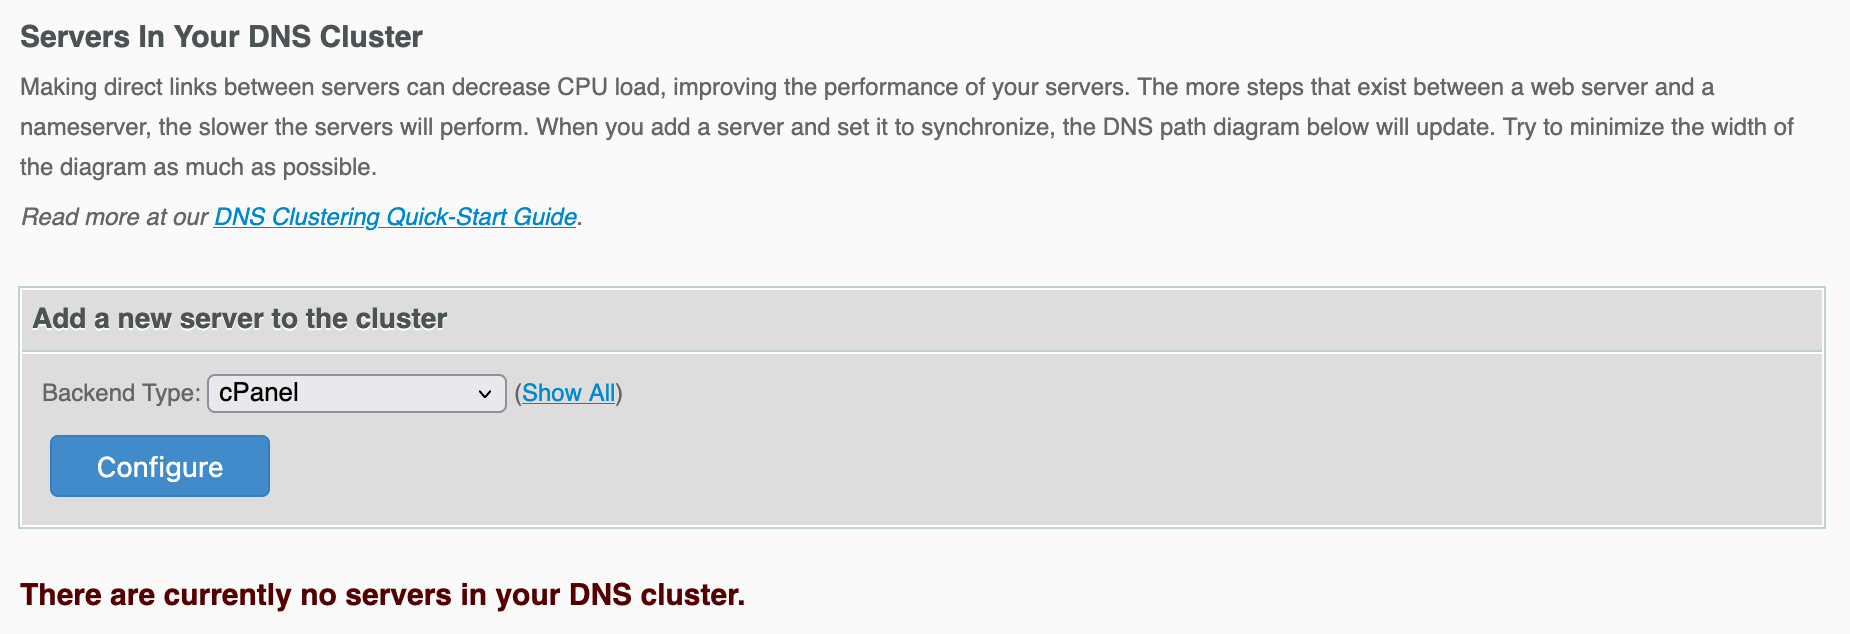
3
Configure the DNS cluster
Enter your bunny.net API key and set the DNS Role to Standalone.You can also enable Sync all DNS zones to automatically synchronize all existing DNS zones to the cluster.You can find your API key in the bunny.net dashboard.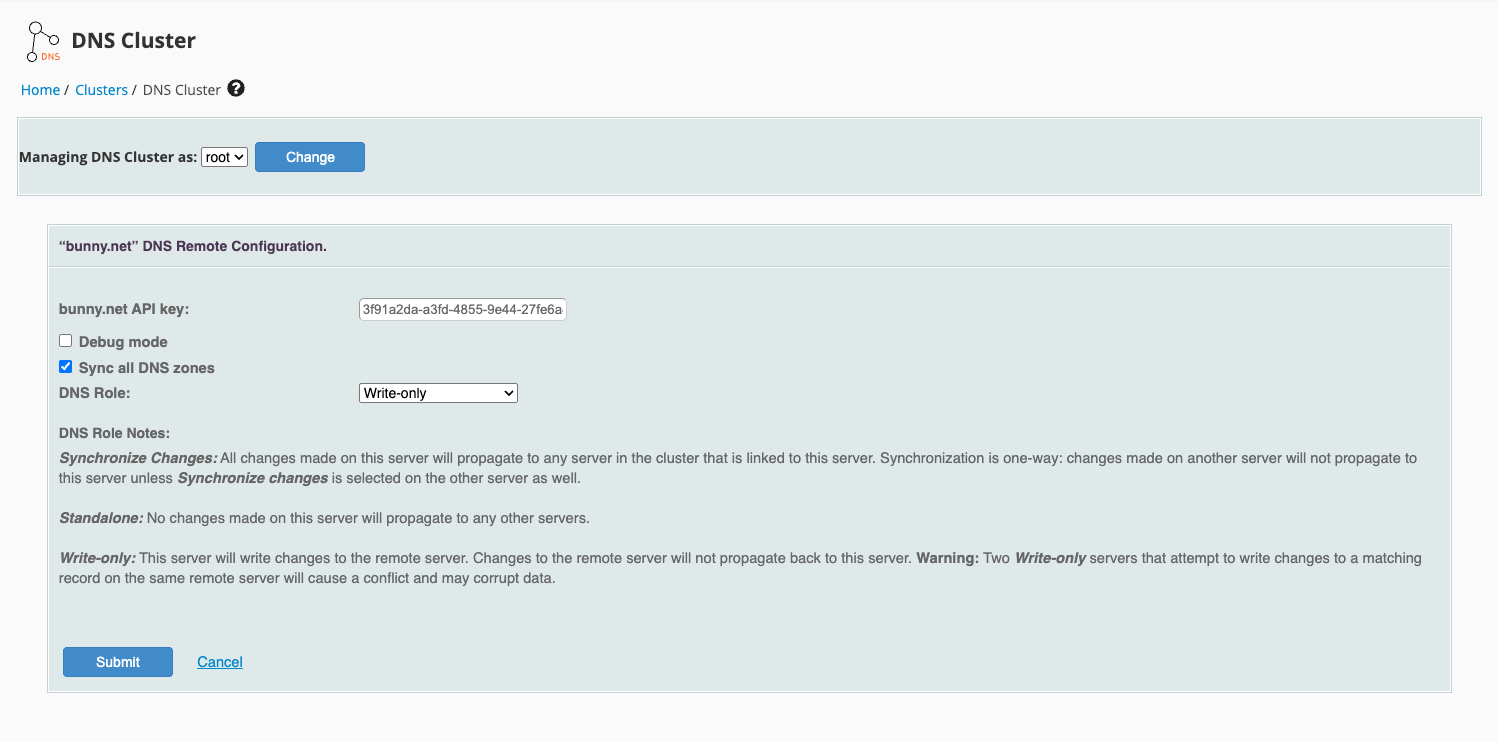
4
Enter your bunny.net API key
Back on the plugin page, enter your bunny.net API key and click Setup.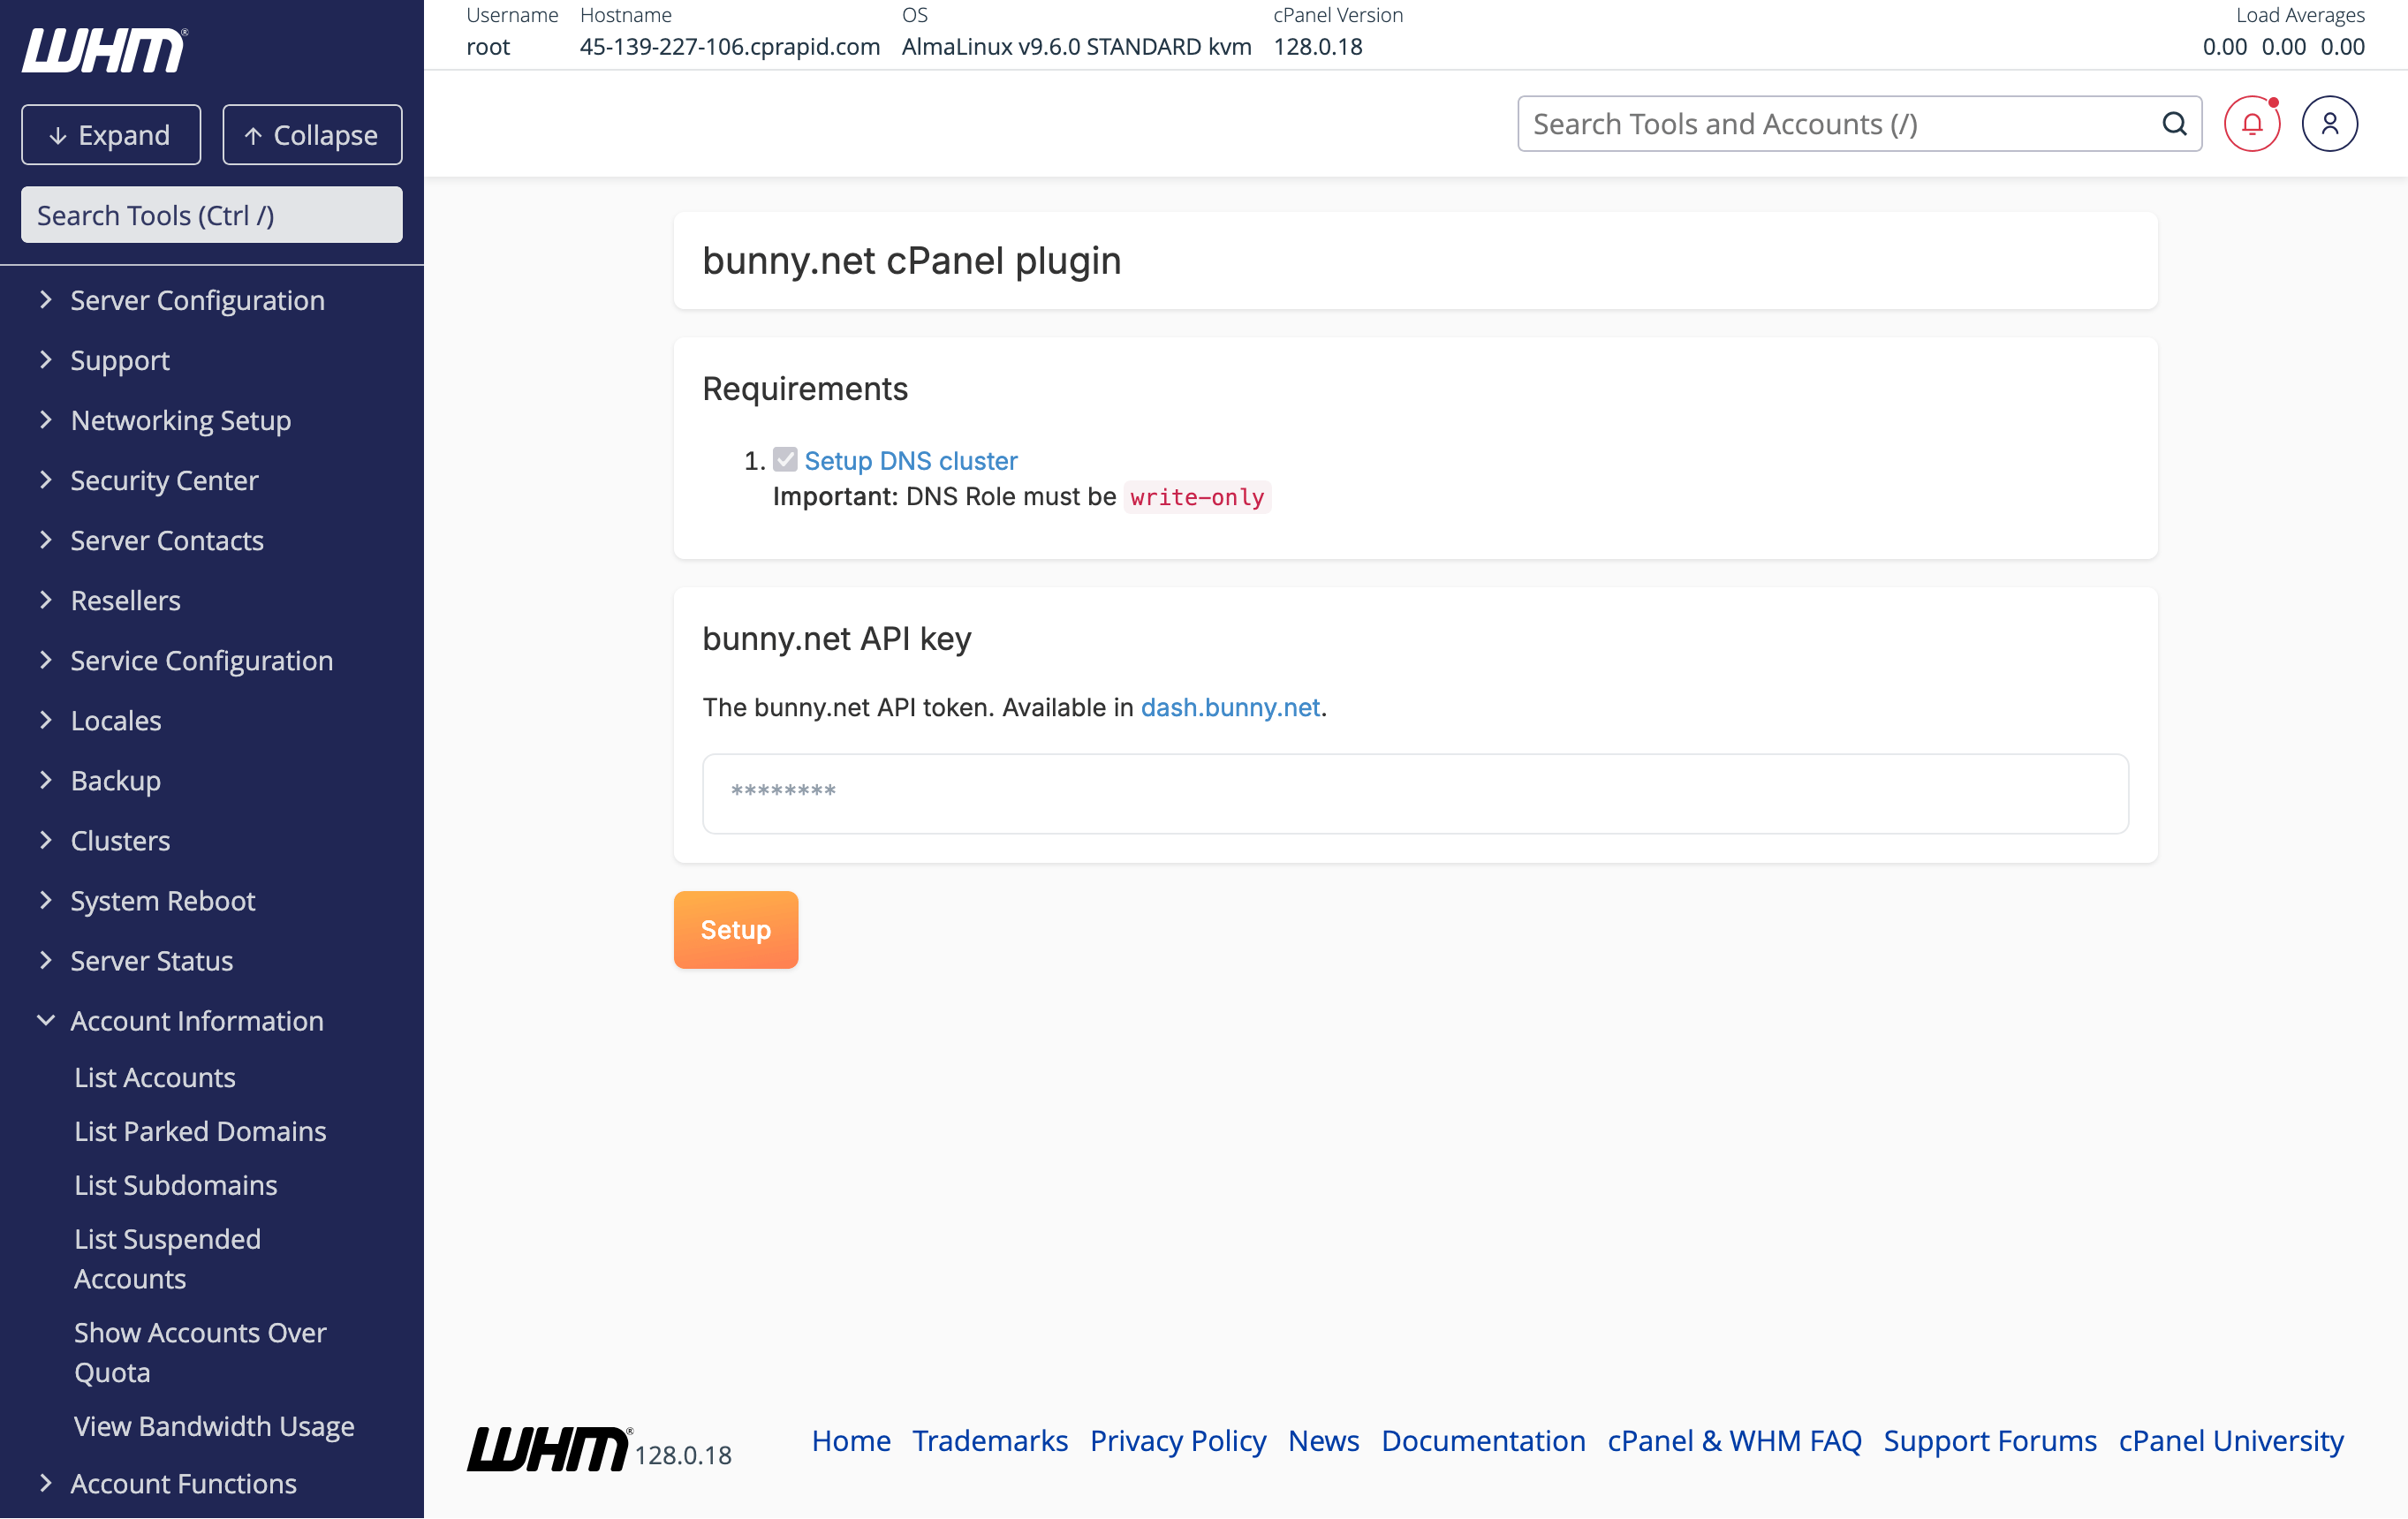
5
Setup complete
The setup is complete. The plugin will display your API keys and the available pricing zones.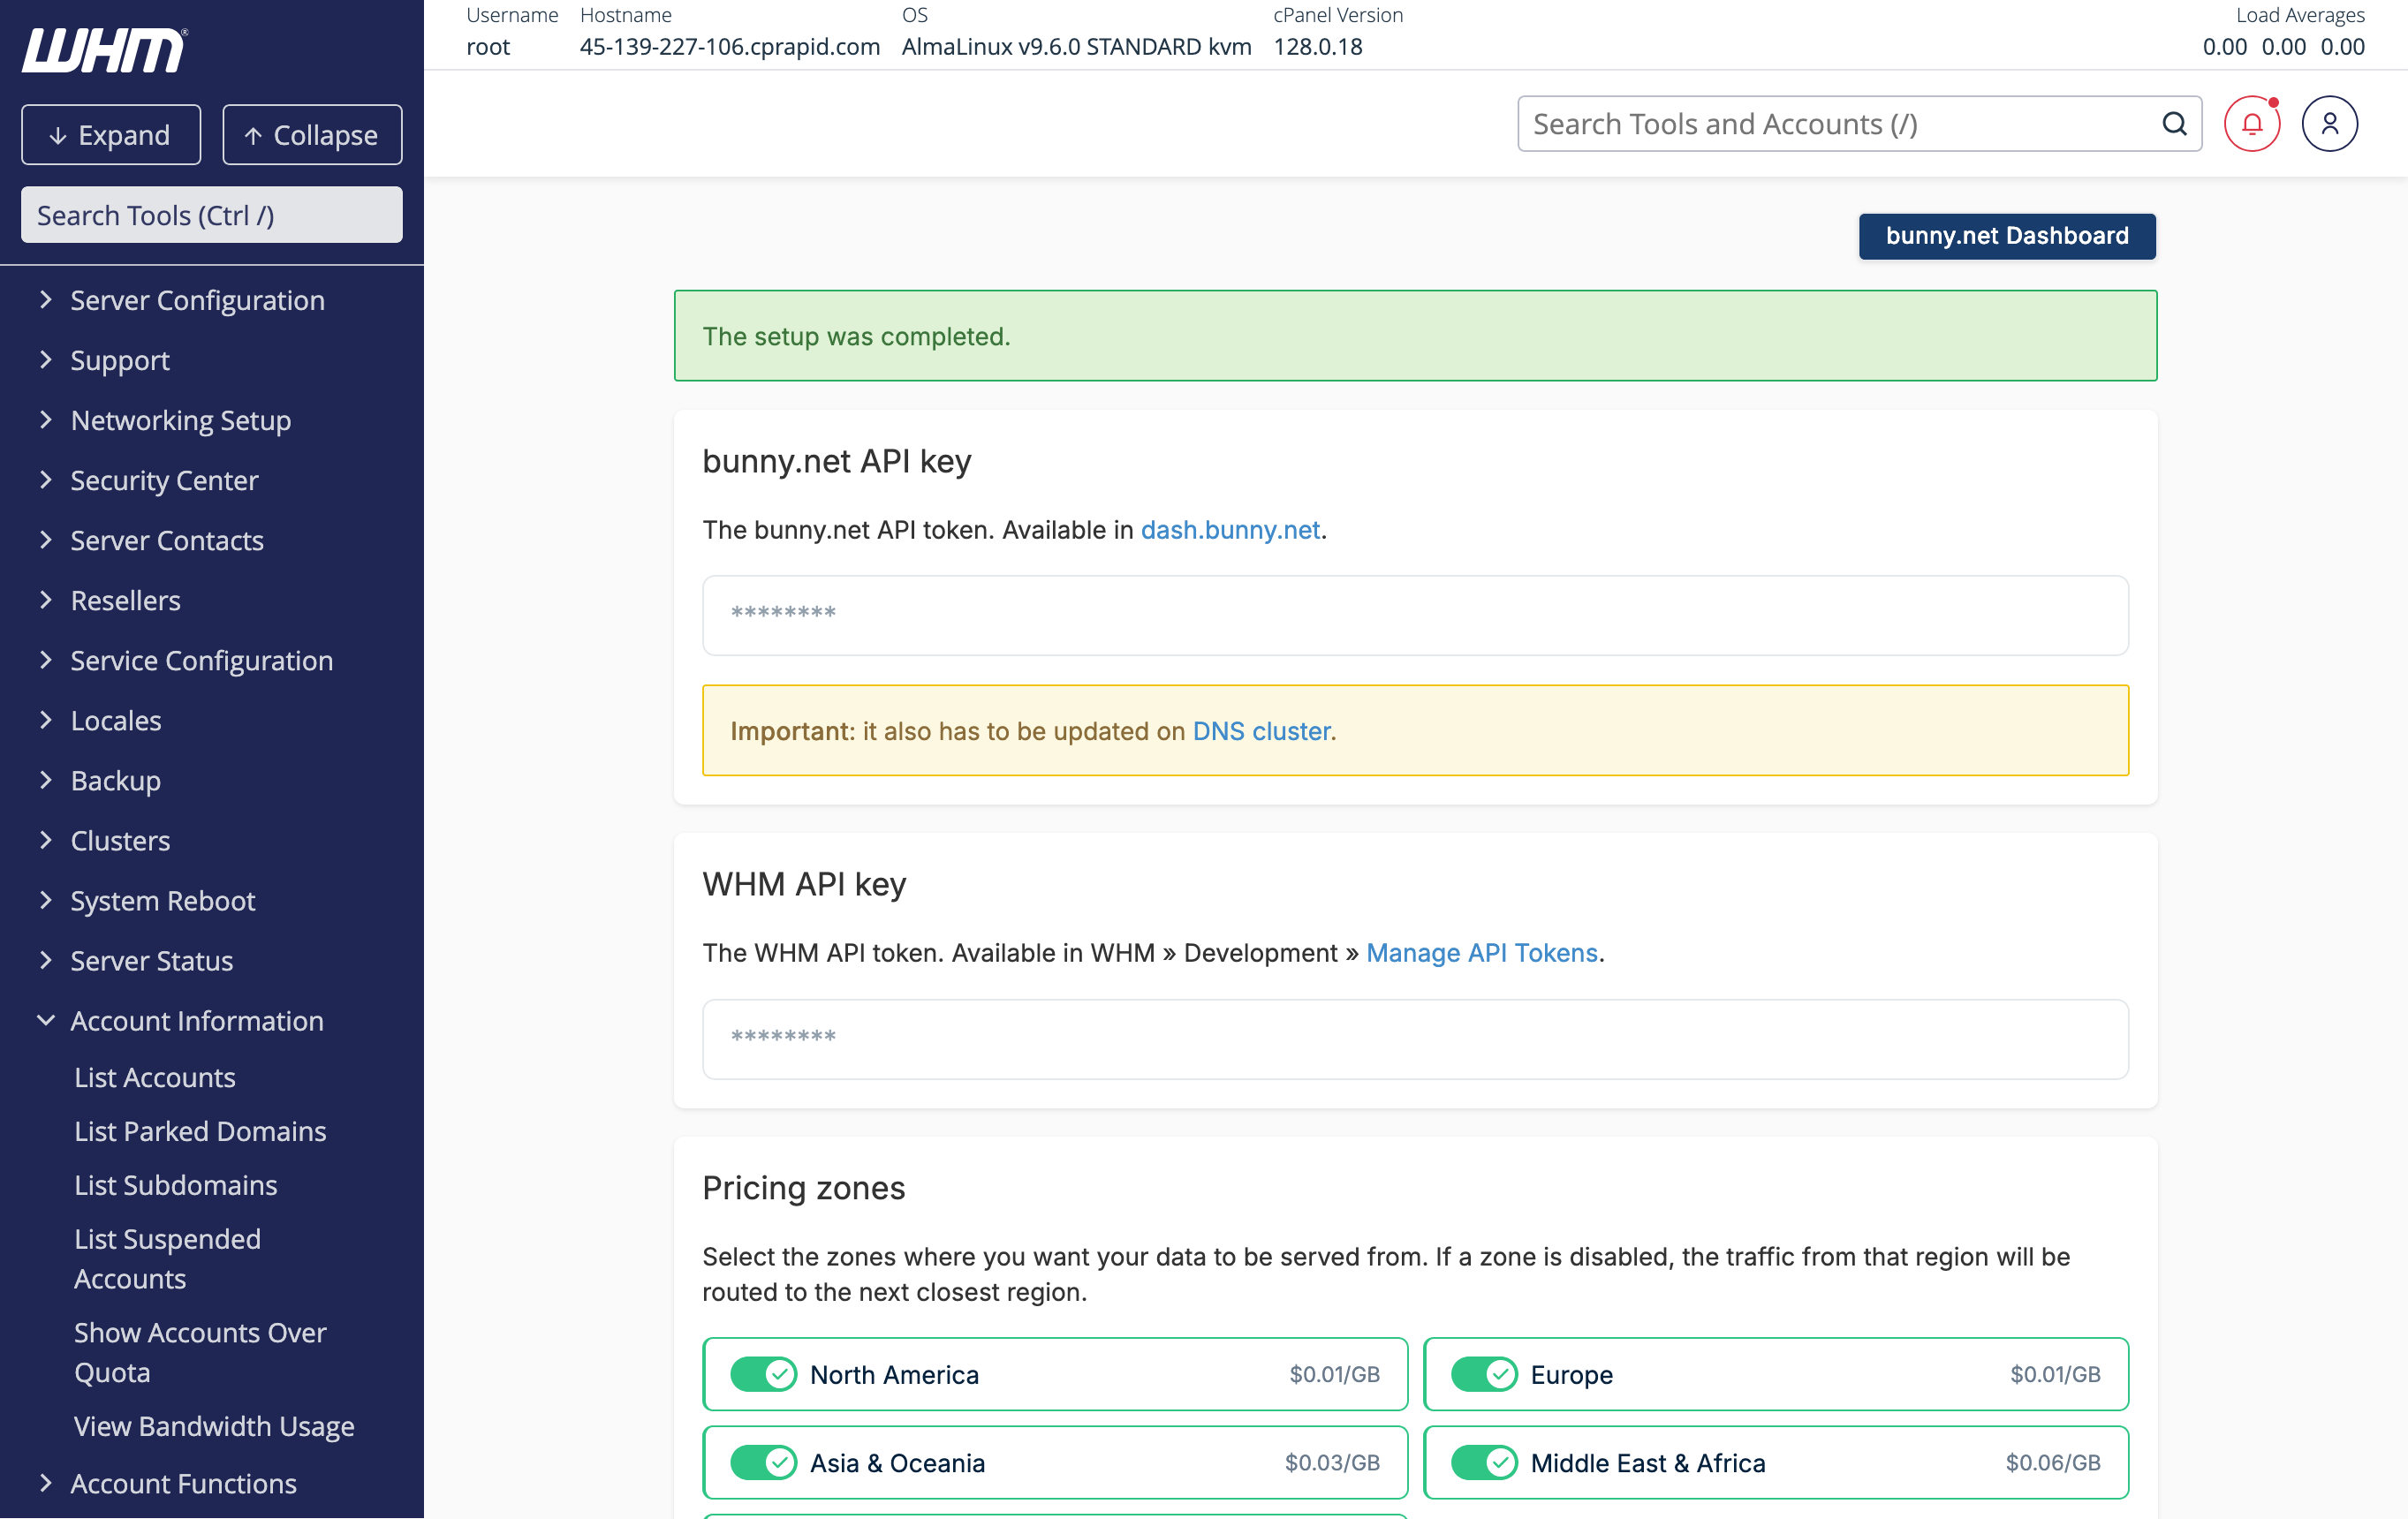
The bunny.net API key also needs to be updated on the DNS cluster. If you see a warning about this, update it in Clusters > DNS Cluster.